Amazon S3 Security Best Practices: A Practical Guide
When it comes to cloud storage options, Amazon S3, or Simple Storage Service, is a name that keeps coming up top.
It’s more than just a storage service; it’s a cornerstone of Amazon Web Services (AWS), offering robust and versatile object storage. Each object, be it a file or a piece of data, is securely stored with its metadata and is assigned a unique identification number. These objects are organized into containers known as “Buckets,” and the beauty of S3 lies in its globally unique naming system for these buckets, ensuring an organized hierarchy in the Amazon S3 namespace.
Additionally, Amazon S3 gives you freedom and control over your data by creating buckets in the region of your choosing. Since you can give these buckets specific rights to enable or prohibit data transfers based on your needs, access control is a breeze. S3 isn’t only for backups; it’s also a powerful solution for online archiving, using the same scalable infrastructure that drives Amazon.com’s extensive worldwide e-commerce network.
In this guide, you will learn how to use bucket policies, access points, and Block Public Access to secure your S3 buckets. Let’s get started

#1 Require HTTPS
Let’s start with creating a S3 Bucket Policy that requires connections to use HTTPS
From the AWS console, click Services and select S3.
Click the bucket name to which you want to apply this policy
Click on the Permissions tab.
Under Bucket Policy click Edit.
Copy the bucket policy below, and paste it into the Bucket Policy Editor.
{
"Version": "2012-10-17",
"Statement": [
{
   "Action": "s3:*",
   "Effect": "Deny",
   "Principal": "*",
   "Resource": "arn:aws:s3:::BUCKET_NAME/*",
   "Condition": {
       "Bool": {
        "aws:SecureTransport": false
        }
    }
    }
  ]
}
Replace arn:aws:s3:::BUCKET_NAME with the bucket ARN available above the Policy Heading above the editor. Make sure you do not delete the /* at the end of the bucket name. It should look similar to the policy below.

Click Save changes
An attempt to access an object on the bucket using HTTP would result in the error below:

A successful attempt to access an object on the bucket using HTTPS would result in the message below:
#2 Require SSE-S3 Encryption
In this section, we will now create an S3 Bucket Policy that requires data at rest encryption.
From the AWS console, click Services and select S3.
Click the bucket name to which you want to apply this policy
Click on the Permissions tab.
Under Bucket Policy click Edit.
Copy the bucket policy below, and paste into the Bucket Policy Editor.
{
    "Version": "2012-10-17",
    "Statement": [
        {
            "Effect": "Deny",
            "Principal": "*",
            "Action": "s3:PutObject",
            "Resource": "arn:aws:s3:::BUCKET_NAME/*",
            "Condition": {
                "StringNotEquals": {
                    "s3:x-amz-server-side-encryption": "AES256"
                }
            }
        }
    ]
}
Replace arn:aws:s3:::BUCKET_NAME with the bucket ARN available above the Policy Heading above the editor. Make sure you do not delete the /* at the end of the bucket name. It should look similar to the policy below.
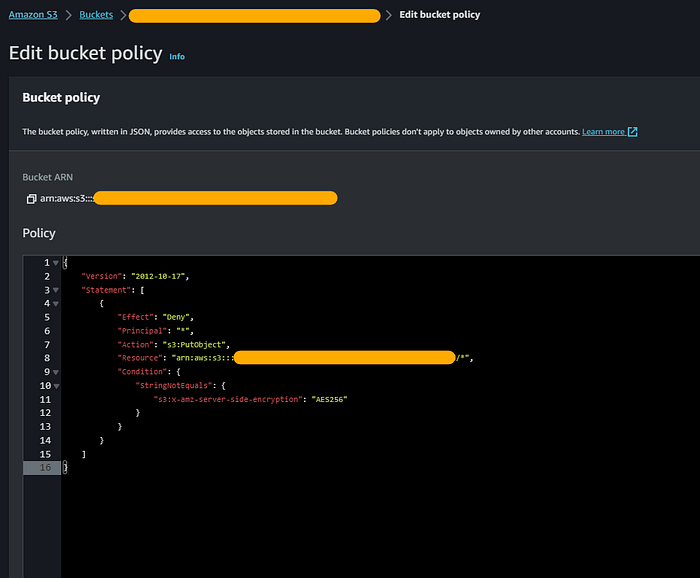
Click Save changes
An attempt to put an object that is not encrypted using SSE-S3 encryption as required by your bucket policy to the bucket should fail as shown in the error below:

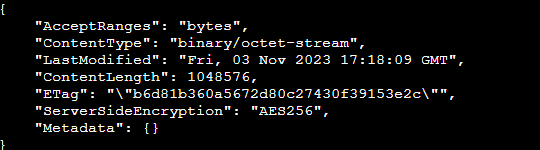
The command that results in the output below succeeded because the PUT operation on the bucket used SSE-S3.

#3 Block Public ACLs
We will now demo the use of block public ACLs.
In this section, we will now create an S3 Bucket Policy that requires data at rest encryption.
From the AWS console, click Services and select S3.
Click the bucket name to which you want to apply this policy
Click on the Permissions tab.
Under Bucket Policy click Edit.
Copy the bucket policy below, and paste it into the Bucket Policy Editor.
{
    "Version": "2012-10-17",
    "Statement": [
        {
            "Effect": "Allow",
            "Principal": "*",
            "Action": [
                "s3:PutObject",
                "s3:PutObjectAcl"
            ],
            "Resource": "arn:aws:s3:::BUCKET_NAME/*",
            "Condition": {
                "StringEquals": {
                    "s3:x-amz-acl": "private"
                }
            }
        }
    ]
}
Replace arn:aws:s3:::BUCKET_NAME with the bucket ARN available above the Policy Heading above the editor. Make sure you do not delete the /* at the end of the bucket name. It should look similar to the policy below.
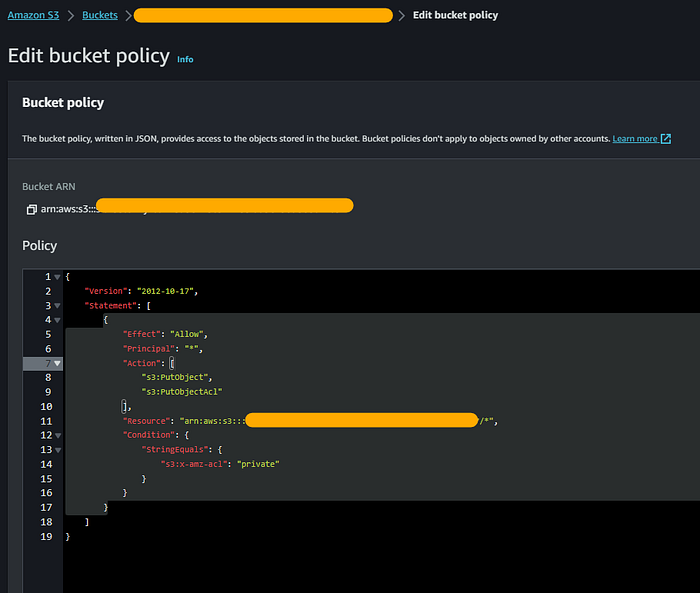
Click Save changes
This bucket policy allows ACLs that are private but does not DENY anything.
It is important to write policies that prevent actions, not allow it when trying to restrict actions against a bucket. This bucket policy also allows Public access to the bucket unintentionally due to the Principal being a wildcard.
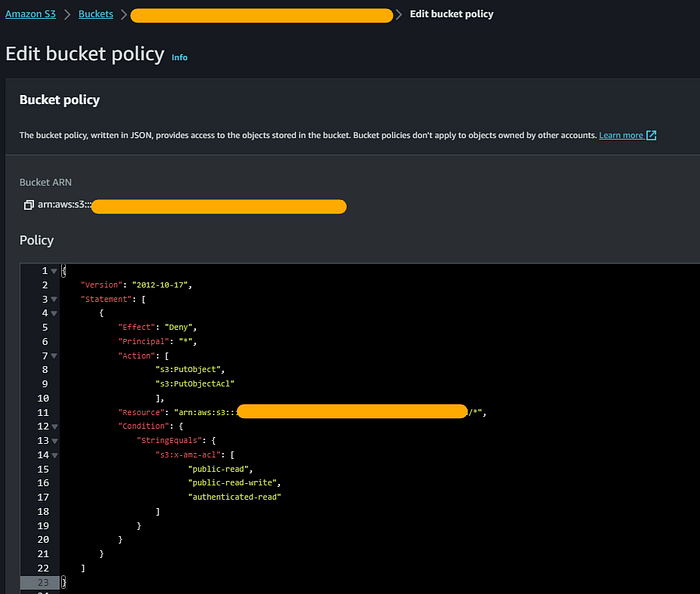
We will now replace the existing policy with the following DENY policy. Don’t forget to replace arn:aws:s3:::BUCKET_NAME with the bucket ARN available above the Policy Heading above the editor. Make sure you do not delete the /* at the end of the bucket name.
{
    "Version": "2012-10-17",
    "Statement": [
        {
            "Effect": "Deny",
            "Principal": "*",
            "Action": [
                    "s3:PutObject",
                    "s3:PutObjectAcl"
                    ],
            "Resource": "arn:aws:s3:::sid-security-7a041a90-7a6c-11ee-861a-0a590db4d40d/*",
            "Condition": {
                "StringEquals": {
                    "s3:x-amz-acl": [
                           "public-read",
                           "public-read-write",
                           "authenticated-read"
                    ]
                }
            }
        }
    ]
}
The request to put an object using a public-read ACL fails as the bucket policy now restricts public-read ACL.

A PUT Object request should succeed since the default for an object ACL is private.
#4 Configure S3 Block Public Access
In this part, we will configure S3 Block Public Access, which is a straightforward way to prevent public access to your bucket.
From the AWS console, click Services and select S3.
Click the bucket name to which you want to block public access
Click on the Permissions tab.
Under Bucket Policy click Delete in case there is a bucket policy present. You may save the policy in a text editor in case you need to restore the policy.
Type Delete and click Delete to confirm.
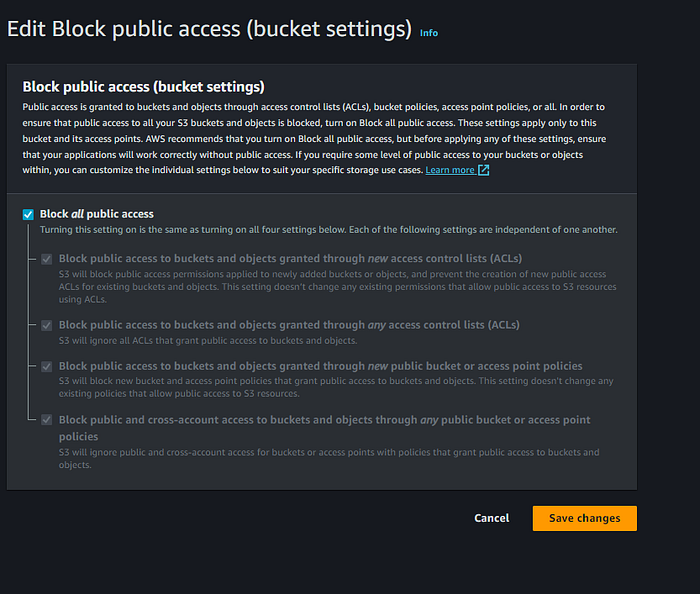
Under Block public access (bucket settings) click Edit.
Select Block all Public Access.
Click Save changes.
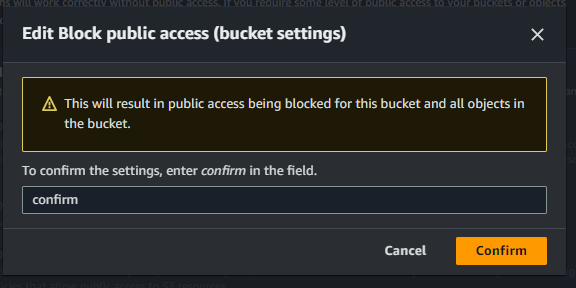
Type confirm to confirm the new settings then click Confirm.
The request to put an object using a public-read ACL fails as the bucket policy now restricts public-read ACL.
A PUT Object request should succeed since the default for an object ACL is private.
#5 Restrict Access to a S3 VPC Endpoint
S3 VPC endpoints allow access to S3 resources from within a VPC and are easy to configure, highly reliable, and provide a private connection to S3 that does not require an Internet Gateway or NAT instance.
In this section, we will configure a S3 VPC Endpoint and a bucket policy to limit access to only requests that go through the VPC Endpoint.
From the AWS console, click Services and select VPC.
Click Endpoints on the left panel.
Click Create Endpoint.
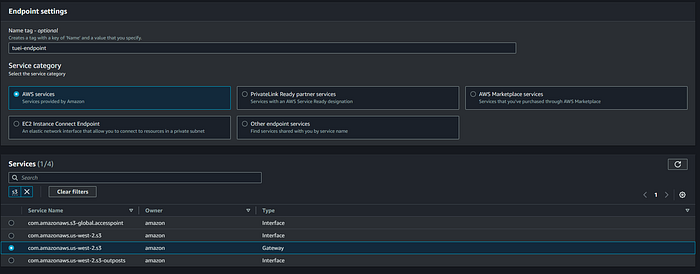
Enter a Name tag of your choice
Select AWS services as the Service category
Under Services, type S3 in the search bar and press enter in order to filter to the list of S3 endpoint services. Select the Service Name with the Type of Gateway.
Under VPC, select the VPC that you would like to limit access to only clients in that particular VPC. Your configuration should look similar to below:
Do not configure any route tables. Leave the Policy set to Full Access.
Click Create endpoint.
Copy the VPC Endpoint ID to your text editor.
From the AWS console, click Services and select S3.
Click the bucket name to which you want to restrict access
Click on the Permissions tab.
Under Bucket Policy click Edit.
Copy the bucket policy below and paste into the Bucket Policy Editor.
{
    "Version": "2012-10-17",
    "Statement": [
        {
            "Action": "s3:*",
            "Effect": "Deny",
            "Resource": "arn:aws:s3:::BUCKET_NAME/*",
            "Condition": {
                "StringNotEquals": {
                    "aws:sourceVpce": "VPC_ENDPOINT_ID"
                }
            },
            "Principal": "*"
        }
    ]
}
Replace BUCKET_NAME with the bucket name and VPC_ENDPOINT_ID with the Endpoint ID. It should look similar to the policy below.
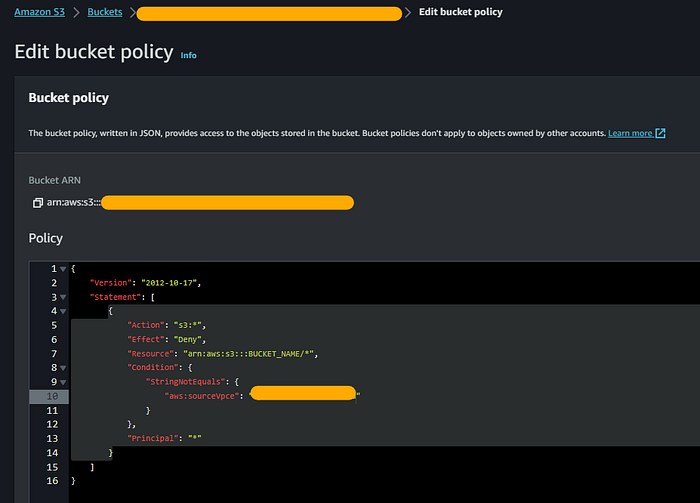
Click Save changes.
A HeadObject request fails because there is no route table associated with the VPC Endpoint

From the AWS console, click Services and select VPC.
Click Endpoints on the column to the left.
The VPC Endpoint we created earlier should be selected. Click Actions and select Manage Route Tables.
Select the relevant Route Table ID in my case SID-routes
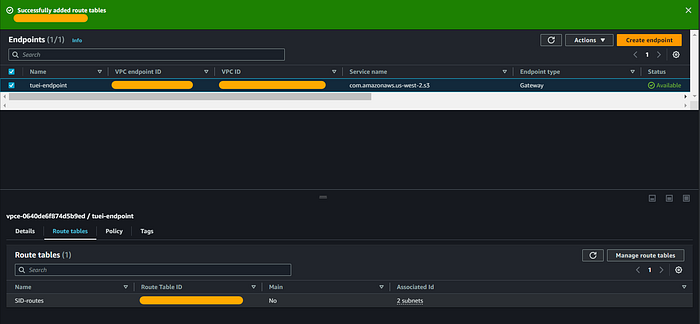
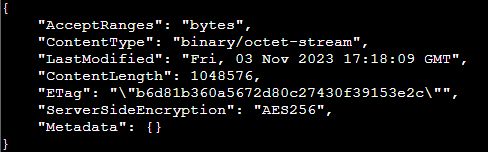
The request now succeeds because you associated a route from a route table to the VPC Endpoint.
Congratulations, you have successfully completed all the practice sections for Amazon S3 Security Best Practices. In this practical guide, you were able to successfully create a S3 Bucket Policy that requires connections to use HTTPS. You then went on to create a S3 Bucket Policy that requires data at rest encryption and demonstrate the use of block public ACLs. You thereafter configured S3 Block Public Access and finally limited S3 access to only clients in your VPC using a S3 VPC Endpoint.
There are two more ways to secure access to your Amazon S3 buckets:
Using AWS Config Rules to Detect a Public Bucket
For more information and an example of an AWS Config Rule for S3 following operational best practices, check the link below.
Use Amazon Access Analyzer for S3
To know more about reviewing bucket access using IAM Access Analyzer for S3, check the link below.
If you found this post insightful, feel free to leave a clap and follow for more posts.

